Using Yeoman With Phonegap and Backbone.js
Being at µForge, we had to face some serious problems trying to fix and use a correct workflow for our Phonegap application.
The application has its core built in Backbone.js and uses jQuery Mobile to render itself. It also comunicates with a Django server that has an API built using Tastypie to get/set the data.
The app is being compiled for Android and I actually have no experiences with Phonegap’s iOs building process, but the principle is sureley the same.
I dont give a f**k about your app, just show us the code!
OK, OK, use the following steps to setup all the base things needed to correctly build a web app with Yeoman using a single Gruntfile:
NOTE: I’ve used the Phonegap 2.7.0 version for this example app, I’m sure that you’ll figure out how to make it work for Phonegap 3+ (afaik it’s easy).
The Setup
First of all, use THIS guide to setup the Phonegap environment. Basically you need to install the Android ADT bundle and setup the global path to make you have the adb command in the terminal and stuff like that.
Create a basic app using the Phonegap binary (inside phonegap-2.7.0/lib/android/bin/)
1
| |
Install Yeoman and the basic backbone generator (or the basic generator-webapp if you prefer)
1
| |
Create a Yeoman project inside the helloapp folder that you’ve created before with the Phonegap’s create command
1 2 3 | |
As you can see, this command will generate a shitload of files in the current directory. Note that the directory name has the first letter uppercase, ‘cause the backbone generator will use that name as the basic namespace.
Install Ripple for Chrome if you want to have a nice looking of the whole app in a pseudo-device. Unfortunately the Phonegap “integration” seems to be broken at the moment, so if you activate the plugin just say that you are testing a normal mobile Web app.
So here’s the trick, you must delete all the asset folder inside helloapp/hello_android/assets/www to allow you to build the app from Yeoman. Create a link from the dist directory of the Yeoman app to the www directory of the Phonegap – android app.
Don’t forget to copy the cordova*.js file to your vendor folder of the Yeoman app.
1 2 3 | |
Your directory tree should look pretty much like this:
1 2 3 4 5 6 7 8 9 10 11 12 | |
Basic configurations
Add these lines in the <head> section of the app/index.html file
1 2 3 | |
Open the Gruntfile and add these two lines
1 2 3 4 5 6 7 8 9 10 11 12 13 14 15 16 17 18 | |
Disable yuglify if you are using backbone, because it does not allow the app to load the files in the correct order.
I’ve noticed that if you don’t do this, the main.js files in the www directory will always have the scripts included in
an apparently random order (so it’s a huge problem if you’re using Backbone)
1 2 3 4 5 6 7 8 9 10 11 12 13 14 15 16 | |
Let’s write a basic main.coffee that allow us to have two different behaviour if we are browsing from Chrome (for debug purposes) or directly from the app:
1 2 3 4 5 6 7 8 9 10 11 12 13 14 15 16 17 18 19 20 21 22 23 24 25 26 27 28 29 30 31 32 33 34 35 36 37 38 39 40 41 42 43 | |
Finally, create an empty cordova_plugins.json in the root of the app folder as required by Phonegap (for cross-domain issues if I remember well)
1
| |
Testing
If you managed to do everything in the correct way, let’s test the mudafucka!
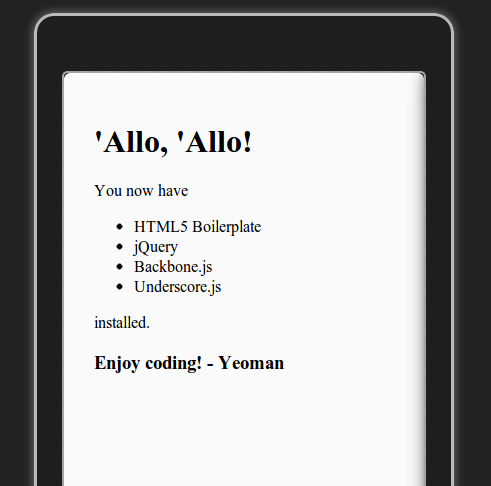
After ALL these passages, you should be able to use the grunt server command from the Hello folder to use Yeoman in the browser
along with Ripple. You should see something like this:
 The base app with Ripple in Chrome
The JS console should show ~this:
![]() The JS console screenshot – click to zoom
The JS console screenshot – click to zoom
Notice the WE ARE IN DEBUG part that indicates the flow of the code. If we launch a grunt --force from the Hello folder, we will not have
all the code compiled in the assets/www folder of our Android project.
Just use Eclipse and open the hello_android folder as an existing Android project and launch it with an emulator or your phone and you should see these lines:
 The logcat screenshot – click to zoom
As you can see, the code followed another flow in comparison with the webapp. In the end these passages allow you to have this kind of workflow:
- You code with your favorite editor while launching
grunt serverto haveLiveReloadactive and be able to see your modifications in REAL TIME (which is the biggest plus) - Test everything related to the app with Ripple, being able to use the JS console to directly debug your code
- Run
grunt --forceto build your app to the android project - Test it every time you need it to an emulator via Eclipse
I’m sure that there are some simplier ways to achieve this but right now this kind of workflow is still mainly unused from the mass. I personally digg too much the livereload advantages along with the ability to debug without the need to place thousands of console.log. Keep also in mind that these libraries are in continue development so its pretty hard to find the right way to do things. ENJOY!
Comments